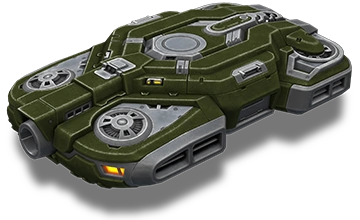
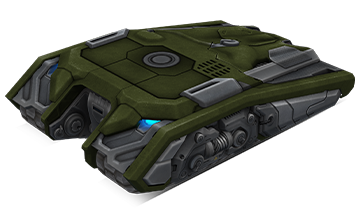
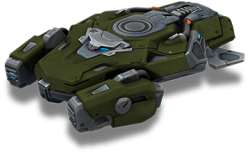
圣骑士指南

想念战斗了吗?!
如果想念,点击开始! |
 |
圣骑士指南
优点与缺点
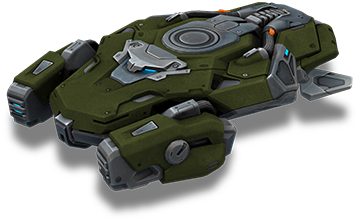
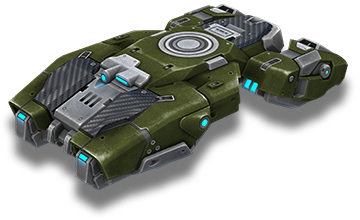
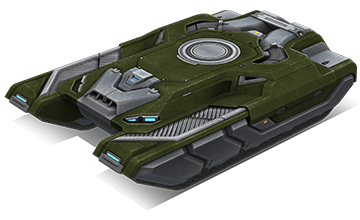
 圣骑士的碰撞体积对于中型底盘来说很小,这使其能够穿过狭窄的通道
- 悬浮能力使其能够通过侧向平移来躲避射击
- 圣骑士的过速装置具有很长的持续时间,可以为盟友提供对负面状态效果的免疫,并削弱附近的敌人
 由于漂移运动,难以进行精确的位置调整
- 悬浮机制使圣骑士对坦克碰撞敏感——无论是盟友还是敌人——这可能会干扰其瞄准
- 圣骑士的过速装置具有游戏中最慢的基础充电率,并且依赖队友的协调才能发挥最大效果
圣骑士过速装置指南
任何底盘最重要的部分无疑是其过速装置。如果使用得当,它有潜力将最艰难的战斗扭转为对你团队有利的局面。当你使用圣骑士时尤其如此。让我们深入分析一下。
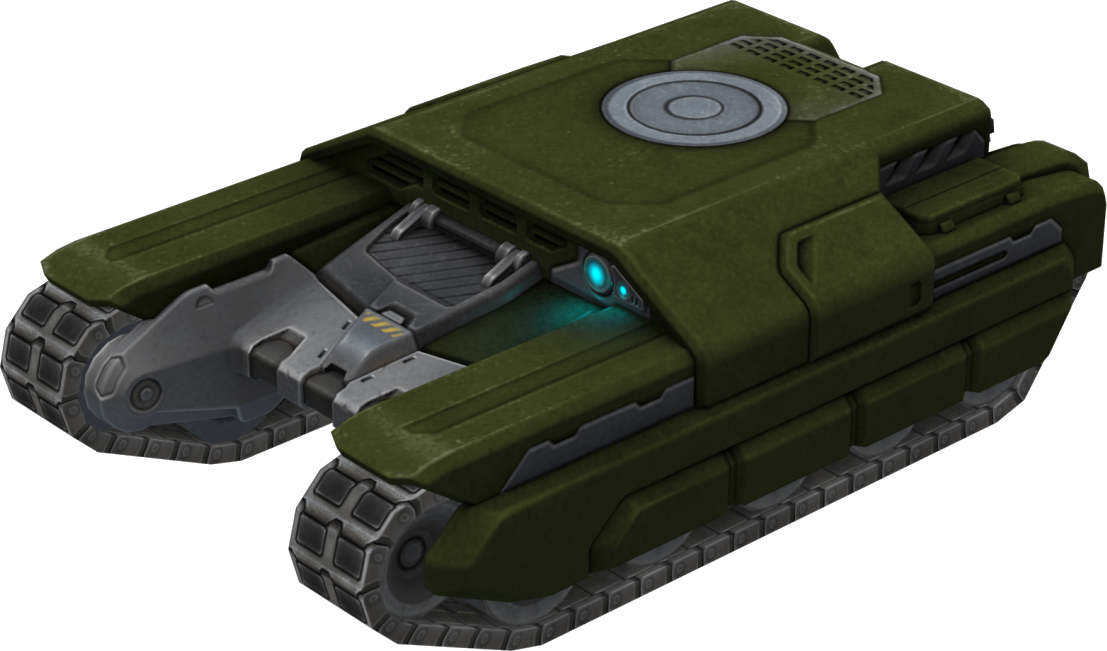
圣骑士的过速装置是“支持极化器”,激活后经过短暂延迟,可为近半径内的所有盟友提供持续治疗和负面状态效果免疫,同时附近的敌人会受到穿甲和干扰效果……真是复杂!但不用担心,读完本指南后,你将更透彻地了解它的作用,最重要的是,何时使用它以及如何发挥其全部潜力。
Most game modes in Tanki Online are team-based offense/defense, and no other hull embodies this spirit more so than Paladin. Its Polarizer is one of if not the most team-oriented Overdrive in the game and thrives in both attacking and defending scenarios. Paladin’s Overdrive provides ample utility to its team by establishing Zone Control; basically it strengthens itself and allies and weakens enemies in its surrounding space. Not to mention, it has a decently long active duration before the Overdrive charge runs out.
Note of caution
Having such a powerful and versatile Overdrive does come with its share of drawbacks.
- Paladin has the slowest Overdrive base charge rate [charge/sec (%)] in the game
- Aside from Nuclear Supplies, there are two ways a hull can charge its Overdrive: one way is through reputation points; the other is by base charge rate. For Paladin, longer charge time means fewer Overdrive activations per battle (~1-2 fewer than others).
- Moreover, the Overdrive charge relies heavily on you gaining points or getting Nuclear supply boxes in battle, which proves extra difficult if your team is behind.
- While activating Overdrive, Paladin is still susceptible to damage and can be quite easily destroyed
- Polarizer provides modest healing, while can increase your odds of survival, is no match against damage-per-second turrets (e.g. Freeze, Vulcan) or one-shot high damage guns. (e.g. Striker, Shaft)
- The green aura Paladin gives off is particularly visible and tends to attract focus fire from experienced opponents.
- With Polarizer on, any reputation points you earn during that time do NOT recharge your next Overdrive
- Similarly, recharging Overdrive by reputation points is also disabled for Viking's Overdrive. But unlike Viking, Paladin's Overdrive can last up to 20 seconds and you will convert reputation points to charge only after your Polarizer ends.
Warning: Polarizer no longer provides critical damage reduction - you will take the full force of every single critical hit! Remember that when playing against Hornet or Viking. (Read below to learn more.)
Interaction with other Overdrives
Your Overdrive is fully charged and you are emboldened by your newfound superpower: surely nothing can stand in your way, right? Well, that is unless the enemy also happens to have its Overdrive ready. (Uh-oh.) Situations like this call for a strategic plan against each and every Overdrive. You are in luck because that is exactly what the following section is all about.
Against enemy Wasp
Who wins: Paladin
Since Polarizer applies Jammer effect, Wasp cannot drop a bomb anywhere near it. Fortunately, the Polarizer effect radius is larger than the N2-bomb lethal explosion radius which means Wasp can only drop the bomb on the periphery. Furthermore, Polarizer also gives Paladin heat immunity, crushing any attempts to even deal burn damage, thus effectively rendering the bomb useless.
- General tips against Wasp:
- As Paladin, be sure not to walk towards the dropped bomb, your Overdrive protects you from burning but not the initial blast. Note the Jammer effect on enemies falls off immediately after they leave your Polarizer radius, so beware of this when chasing after a Wasp or else you might run towards an explosive farewell gift!
- Most hulls (other than Wasp) have a slight warmup time after activation before the Overdrive is in effect. Time your Overdrive activation well before coming close to the enemy Wasp.
- If a bomb is dropped near you, do NOT active your Overdrive. If the bomb explodes during your warmup time, you will be stunned and lose your entire charge!
- Wasp bomb applies Jammer effect to anyone with direct line of sight to the explosion. Hence, if you have not activated your Overdrive during bomb countdown, hide behind terrain or walls so you won't be affected by the incoming Jammer effect
Against enemy Hornet
Who wins: It depends
When playing against Hornet, the thing to watch out for is its Supercharge effect which gives 100% critical chance to its turret for 7 seconds. Curiously, critical damage does not increase the damage of all turrets equally! (In fact, over half of the turrets’ damage stays unchanged while the rest increases anywhere between 50%-200% in damage.)
- General tips against Hornet:
- Against turrets: Firebird, Freeze, Smoky, Striker, Vulcan, Railgun, Gauss, and Shaft, you should take cover and avoid any exchange of fire - wait for Hornet’s Supercharge effect to end after 7 seconds
- Use Boosted Armor and activate your Polarizer to counter the AP status effect if needed
Against enemy Hopper
Who wins: Paladin
Hopper is quite similar to Wasp - both are faster than Paladin and have Overdrives that set tanks ablaze in a small radius. They need to get close to you in order to use their Overdrives effectively. Unlike Wasp, Hopper’s Overdrive fires after a 1.1-second delay but does not deal blast damage. As Paladin, the same principle holds: never approach Wasp/Hopper without your Overdrive fully active.
- General tips against Hopper:
- Remember there is a slight delay time before your Polarizer is active. If Hopper stuns you during your warmup, you will lose your entire charge! So time your Overdrive wisely.
- With Polarizer on, you are immune to all negative status effects, including Hopper’s stun and burn (Feels bad, Hopper fans!)
Against enemy Paladin
Nothing screams arch-rivalry much like you against... yourself (or at least an alternate version of you).
When you are fighting from a distance, there is really not much use for your Overdrive, and should save it for another occasion. But in close quarters, needless to say, the one with Overdrive active has the upper hand. Always use your Overdrive proactively before the enemy does and keep them within your Polarizer range so the Jammer status can prevent them from activating theirs. If the tables are turned and you find yourself trapped with an opponent about to use his Overdrive (indicated by a white glow), keep them at arm’s length if possible and use this brief window to activate yours.
- General tips against Paladin:
- Use your Overdrive proactively and try to activate it before the enemy can react
- There is a warmup time before the enemy Overdrive is in effect, take this chance to activate yours!
- Use Speed Boost to help keep the enemy within your Polarizer range or to escape enemy's Polarizer range
Against enemy Viking
Who wins: Viking
Paladin Overdrive is no match against that of Vikings, when you see a Viking using its Overdrive, Take Cover! (Better yet, Hide - the moment you see a white glow from its hull!)
In most cases, this matchup is quite lopsided. However in the rare circumstance when you manage to prevent Viking from using its Overdrive, you just might defy the odds and be triumphant. Recall that your Overdrive applies the Jammer status effect. Try to sneak up on a Viking (e.g. from behind or by jumping from above) and simultaneously activate your Polarizer. Keep it within your Overdrive radius to maintain the Jammer effect.
Warning: Use this strategy only if you can come very close to the Viking. Otherwise, it can escape your range with its superior speed and maneuverability, then activate its Overdrive and turn the fight completely around.
- General tips against Viking:
- In most cases, the best course of action is to concede and flee - wait until its Overdrive effect ends in 7 seconds
- A risky strategy is to surprise the Viking by using your Overdrive before it can react
- If you find yourself (and your teammates) under fire from an Overdriving Viking, do NOT activate yours! The 1.1-second delay before Polarizer is active means you will most likely be destroyed by then and you risk giving up your precious Overdrive charge
Against enemy Hunter
Who wins: Paladin
Paladin’s Overdrive makes it immune to negative status effects, including but not limited to Stuns and EMP. The aforementioned are primarily what results from Hunter using its Overdrive on you at close range. It is a no-brainer to say that in general Paladin can easily counter Hunter’s, EMP Pulse. But there are a few nuances worth mentioning here.
Often overlooked by the typical tanker, Hunter’s Overdrive also applies the Jammer effect to all enemies within a radius (larger than that of Stun and EMP) for a good several seconds. This will delay any attempts for you to use your Polarizer if you have not done so by then. Moreover, unlike Wasp’s bomb which can also apply the Jammer effect, hiding behind terrain does not help against Hunter, since Jammer is cast onto all enemies within the radius.
Avoid approaching Hunter without your Polarizer FULLY active (note the 1.1-second delay). However, if you do find yourself trapped with a Hunter and it is in the middle of using its EMP pulse (white electricity surrounding it), do NOT be tempted or pressured to use your Overdrive. Since you will be stunned during your warm-up and lose your Overdrive charge.
- General tips against Hunter:
- Always use your Overdrive well ahead of coming in contact with Hunter
- If Hunter uses its Overdrive before you can, back away quickly to avoid the Jammer status effect, then retaliate using your Polarizer
- In close proximity with a Hunter about to use its EMP pulse without your Overdrive, do NOT active it since you will likely be stunned during that time
Against enemy Crusader
Who wins: Crusader
Crusader’s Overdrive fires an icicle that can travel long distances, dealing high splash damage and applying AP effects upon impact. What is immediately clear is the range disparity between the two hulls’ Overdrives. Paladin’s effectiveness lies in getting up close and personal with the opponent while Crusader’s power comes from keeping its distance and reliably landing its projectile.
If Crusader is beyond reach and is outside of your Polarizer’s radius (25 meters), your strategy is to play safe and anticipate its icicle. Never charge directly at it since you will be an easy target. Watch out for the white glow from its hull, after a short delay the projectile will fire at you with lightning speed. One thing to note about Crusader’s icicle is the absurd damage: a direct hit can destroy any medium hull of the same modification! Try your best to hide behind walls or terrain. If you are in an open area, try to dodge sideways unpredictably and use your Boosted Armor supply.
- General tips against Crusader:
- Be aware of the range difference: Crusader’s icicle can reach you from afar where your Polarizer is ineffective. Try to stay clear of open areas and make yourself a harder target
- Icicle deals huge damage applies freeze and AP effect: use your Boosted Armor to survive the damage and activate Polarizer to counter the status effects
- At very close range, you can use the icicle against Crusader with the splash damage. Follow it closely and it will think twice before using its Overdrive whereas you have free rein to use yours.
Against enemy Dictator
Who wins: It depends
This is quite similar to our analysis of Hornet, the biggest threat to you is their Overdrives which grant them several seconds of Supercharge effect (i.e. guaranteed critical hits). Playing against Dictator is a bit more challenging since Supply Overload also refreshes its supplies and fully freezes nearby foes.
- 对抗敌方独裁者的通用技巧:
- 对抗炮塔:火焰炮、冰风暴、轰天炮、火箭炮、极速炮、激光炮、电磁炮和镭射炮,你应该寻找掩体并等待增压效果在 9 秒后结束
- 供应过载会刷新其所有道具,包括护甲提升。
- 不要只盯着击杀,经验丰富的独裁者可以使用维修工具,然后使用供应过载在短时间内两次补充其生命值
Against enemy Ares
Who wins: It depends
Ares’s BFG Cannon fires a ball of plasma traveling at moderate speed, which heals allies and damages enemies, and explodes when hitting terrain. With some distance of separation, you can quite easily avoid the damage by strafing sideways. When fighting at close range, you should always use your Polarizer to apply the Jammer effect on Ares, stay on its track and avoid a point-blank plasma ball counterplay.
- General tips against Ares:
- When a plasma ball is coming your way, stay clear of terrain or walls that let you be damaged by the explosion
- If you are not at close range, don’t drive straight towards Ares as this lines up conveniently for an Ares Overdrive
- Use your Polarizer early before coming into range so you can instantly apply the Jammer status effect
Against enemy Titan
Who wins: Paladin
Titan’s Protective Dome reduces incoming damage by 90% - insofar as it is not Armor-Pierced. That is exactly when the AP effect from your Polarizer comes in handy. When playing against Titan, if it has a protective dome deployed, sneak behind them and activate your Polarizer, this can easily catch it off guard. However, if you have no way of getting close to it undetected, then it is best to avoid exchanging fire when it is so heavily protected.
Against enemy Mammoth
Who wins: Paladin
Mammoth’s AT-field only source of damage is by contact. This can be avoided by either staying out of range entirely or preventing its Overdrive at close range. Similar to Ares, when fighting at close range, you should always use your Polarizer to apply the Jammer effect on it and maintain this effect by following it with your faster speed. Note if the Jammer effect is not sustained, this will give it a window of opportunity to activate its AT-field, which lets it regain full health, move faster, and potentially turn you into scrap metal.
Tips and tricks
Generally, there are many advantages of playing hover hulls - they are very maneuverable and can effortlessly drift across the map. However, Paladin as a medium hover hull has its weak points too, namely, it is light and can easily flip when falling off-ramps. When jumping from heights, always keep your hull pointing forward and fire your turret midair and you can land upright. It will be trickier to pull off with turrets without recoil (e.g. Firebird).
When using your Overdrive, stay behind allies whenever possible and don’t charge headfirst into combat (unless you have a melee turret) since you will most likely be targeted. By healing your allies in front and you taking cover, you can survive for much longer and continue to impact the fight. Also, your Polarizer's status effects can in fact pass through small terrain - even with a boulder or wall blocking your view, you can still apply AP and Jammer effects to enemies (or immunity to allies). If you are running low on health, hide close to a wall away from enemy fire, while still contributing to the fight via your Overdrive.
Preferred equipment and playstyle
Preferably, Tesla goes the best with Paladin because if you want to break into the enemy base, you need a weapon like Tesla which can create a chain reaction to damage all the enemy defenders, this synergizes well with Paladin’s Overdrive which weakens their armor.
If melee turrets don't suit your taste, try Smoky and Paladin. Smoky works well in all ranges and has a selection of great augments for your choosing. Further, you can transform into an unstoppable force with Vulcan and Paladin, zero reload and an insane firing rate let you shred your enemies from a distance, when paired with Paladin's Overdrive of status effect immunity, rest assured you can keep dispensing bullets without the worry of overheating.
Paladin as a defender: Paladin can be a great hull when it comes to defending whether your base or a control point. You can remotely help your fellow defender's teammates as upon invasion in your base, you can activate your Overdrive which will heal your teammates and not let them lose control of base as well as it will tear up the armor of the enemies who dares to invade your base.
Paladin as an attacker: With no doubt, Paladin being used as the attacker is already seen in battles. It is a medium hull that has pretty good speed and if used with drones like booster, defender, or trickster, it can be a deadly attacker in an enemy base. Once again, the Overdrive of Paladin is key to sabotaging enemies' backlines. Use a melee or close-ranged turret and dominate your battles.
Paladin as midfielder: If you are a midfielder who adapts their position according to the situation of battle then of course Paladin is the right choice. Using a mid or long-ranged turret work best in this role, which allows you to contribute to fights from a distance. However, some long-ranged turrets such as Shaft and Magnum have slow horizontal rotation and it is advisable not to use them on Paladin, as hover hulls depend on turret rotation to look around.